搭建组件开发环境2
- 参考 组件开发环境搭建
选择组件的基类
- 参考 组件的类继承关系列表
demo组件样例:
import * as _ from 'lodash';
import { ContainerBase } from "yh-designer/dist/base/ComponentBase";
import { Component, serialize } from "yh-designer/dist/base/decorators/Decorators";
import { EventAttrEditor } from "yh-designer/dist/designer/attrbuteEditors/EventAttrEditor";
import { InputAttrEditor } from "yh-designer/dist/designer/attrbuteEditors/InputAttrEditor";
import { Common } from "yh-designer/dist/utils/Common";


/**
 * jss对象
 * */
interface DemoStyle {
    Demo
}
/**
 * Demo组件
 */
@Component({ icon: 'fa fa-address-card-o', gourp: 'form', title: 'Demo组件', name: 'Demo组件', , help: 'http://help.kdayun.com/docs/mindoc/' })
export class Demo extends ContainerBase {
    /**
     * 的标题
     */
    @serialize(String, 'Demo标题')
    title: string
    /**
     * 组件宽度
     */
    @serialize(String, '400px')
    width: string
    /**
     * 组件的高度
     */
    @serialize(String, '300px')
    height: string

    /**
     * 点击脚本
     */
    @serialize(String)
    clickScript: string

    constructor(config) {
        super(config);
    }

    /**
     * 这里是渲染组件的Html元素地方
     */
    doGetElemtHtml() {
        return [
            '<div>' + this.title + '</div>'
        ].join('')
    }
    /**
     * 这里组件渲染的主方法
     * @param parentCmp
     */
    render(parentCmp) {
        //调用父类的渲染
        super.render(parentCmp);
        let that = this;
        if (!that.getDesignModel()) {
            this.$elemt.on('click', function (e) {
                that.stopEventPropagation(e);
                that.enable && that.raiseEvent('onClick', that);
                //这里触发点击事件
                that.raiseOnClickScript();
            });
        }
    }

    /**
     *  触发点击事件脚本的函数
     */
    raiseOnClickScript() {
        if (Common.isNotEmpty(this.clickScript) && this.enable && !this.getDesignModel()) {
            let fn: Function = Common.evalScript(this.clickScript)
            if (_.isFunction(fn)) {
                let params = Array.prototype.slice.call(arguments);
                if (params.length < 2) {
                    fn.call(this, this);
                } else
                    fn.apply(this, params)
            }
        }
    }
    protected doGetClassName(): string {
        return this.css.Demo
    }
    css: DemoStyle
    /**
     * 这里是设置css地方
     * 使用的是jss
     */
    doGetCss(): DemoStyle {
        const styles = {
            Demo: {
                "clear": "both",
                "background": "red",
                "position": "relative",
                "& *": {
                    "font": "inherit",
                },
            },
        }
        return styles;
    }

    /**
     * 这里设置组件的属性编辑器
     * */
    getAttrEditors() {
        let that = this;
        let atrr = super.getAttrEditors()
        atrr.push(new InputAttrEditor(that, {
            attr: "title",
            labelCaption: "Demo标题",
            title: "Demo标题",
        }));
        // 设置按钮的点击脚本属性编辑器
        atrr.push(new EventAttrEditor(that, {
            attr: "clickScript",
            title: "",
            btnText: "点击事件",
            demo: `function Button1_onClickScript(cxt: ScriptContext, btn: Button) {
    Common.msg('hello')
}`,
            parameter: "cmp:" + Common.getClassName(that)
        }));
        return atrr;
    }

}
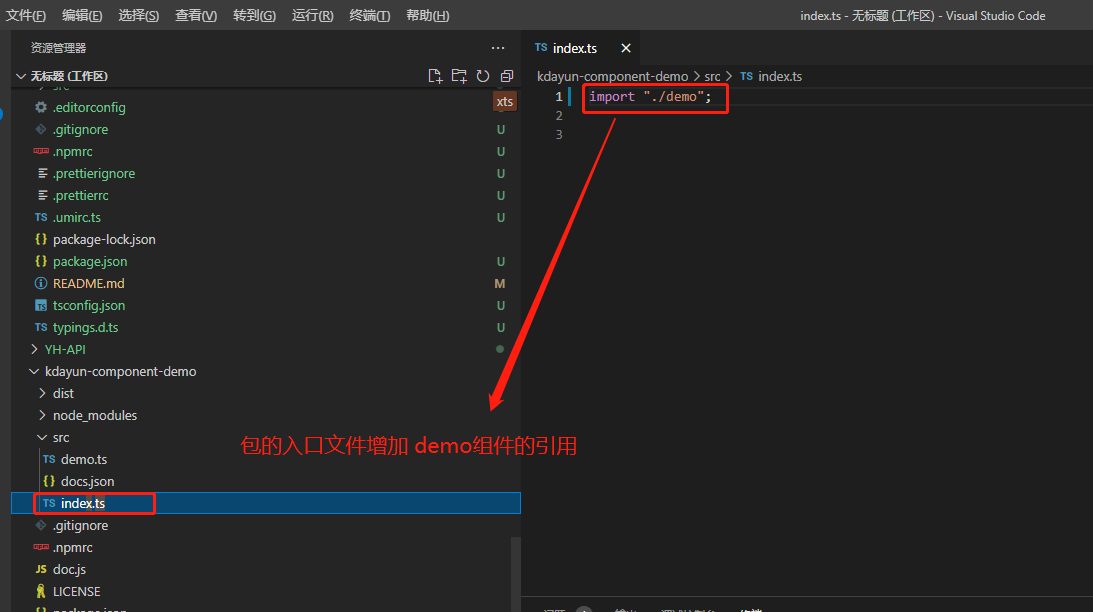
更新index.ts 文件的对demo组件的引用
组件编译
终端中输入: tsc

组件发布
终端中输入:
npm run deploy 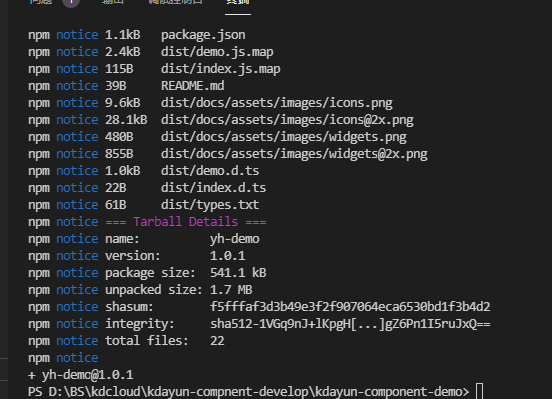
组件的打包/发布/调试
终端打开打包工程
添加包的依赖
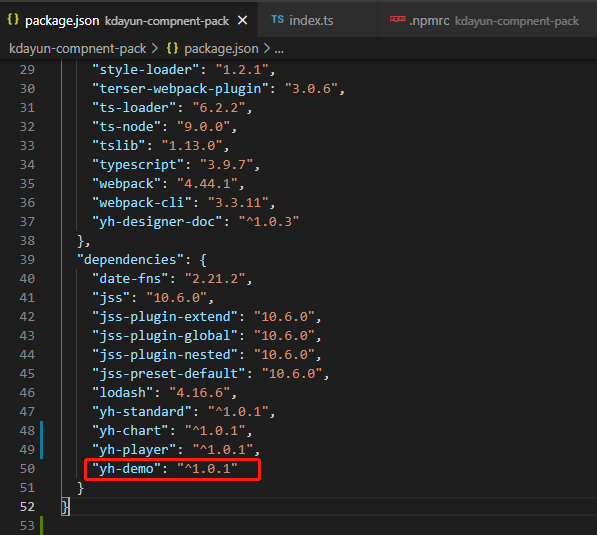
终端中输入:
npm i添加包的入口引用

终端中输入:
npm run build-dev
文件同步/调试
无需与服务器交互的组件调试
- 在打包工程目录/dist 启动http服务 .注意是: dist 目录
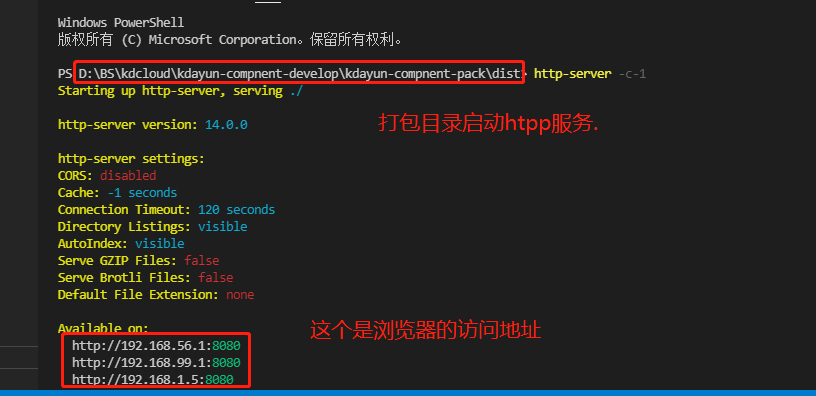

- 调试 浏览器打开F12 , ctrl+o

- 在打包工程目录/dist 启动http服务 .注意是: dist 目录
需要与服务器交互的组件
- 利用FileGree拷贝到之前搭建的本地服务器环境

- 调试 预览页面 F12 , ctrl+o
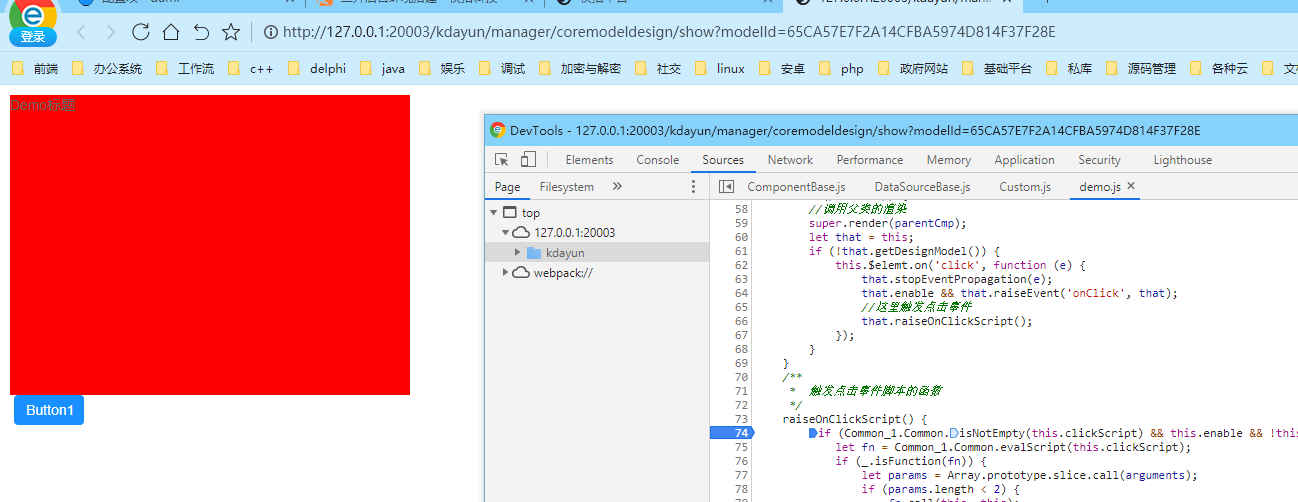
- 利用FileGree拷贝到之前搭建的本地服务器环境
调试技巧
- 在脚本内增加: debugger

- 在脚本内增加: debugger
参考
组件的类继承关系列表
组件开发环境搭建
Typescript中文手册
TS 与 OOP
作者:admin 创建时间:2022-12-05 17:13
最后编辑:texbox 更新时间:2024-10-17 08:28
最后编辑:texbox 更新时间:2024-10-17 08:28
